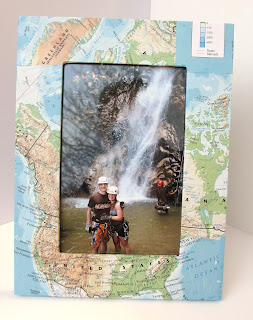
This may not be a stereotypical Valentine's post, but it is still really cool! Maps are so fun to use in crafting because they add a sense of adventure. I especially love this one because I was able to get the whole west coast onto one side. Both my boyfriend and I are from opposite ends and we met in the middle :)
Ingredients:
- Mod Podge & Brush
- Map
- Frame ($3 Target)
- Screw Driver (to remove hardware)
First take apart the frame. You do not want Mod Podge on glass!
Then figure out where you want your map to sit on your frame. After you are satisfied with placement, start layering.
For the inner corners cut a line inward and fold the map in. This creates a polished look.
Don't worry too much about the paper bubbling, it will deflate as it dries. Plus maps are pretty intricate so it won't be obvious.
Don't forget to poke the hardware holes so you know where to attach everything at the end.
After it dries attach the hardware and replace glass. Then put a picture in the frame. I picked one from a trip to Mexico!
My map was not very large so I pieced together a bunch of map parts. If you look closely you can see Greenland above the US and Canada covering NY. But from a distance it looks really great. Maps are so cool!


Forge alliances and dominate the battlefield! Lucky Cola
ReplyDelete